Saturday, December 3, 2016

About the Recipe: Pup-kin Oatmeal Muffin Treats


Please forgive the pun… it’s not meant to be pandering, exactly; but I’ve got to be sure to reach my target audience. And yes, I know pup-kin isn’t terribly original as far as puns go; however, I couldn’t figure out a way to alter the word muffin to imply they were made specifically for dogs.

Also, I know I’d previously implied, slightly, that November was going to be dedicated to the sweet potato (and you’ll have to forgive me for waiting a week to post this—as it’s now December); but I didn’t have a sweet potato nor did I want to buy one. For this recipe, I was very opportunistic with my ingredients overall; and I did have another partial can of pumpkin puree setting in my fridge just itching to get used. Of course, a cooked, mashed and cooled sweet potato could be substituted easily and would work out just as well if you have an extra one of those lying around from your Thanksgiving Day cooking.

My Thanksgiving Day went well; and I made a couple of chocolate-meringue pies and cranberry sauce for my pot-luck, extended-family gathering on Thursday. Then as is our tradition, my mom and I went shopping afterward; and since we didn’t get home until almost 8 am Friday morning, I ended up sleeping there until later that afternoon when I helped put up her Christmas tree. If you’re thinking I’m a dutiful son, please hold your praise—I hate doing it and complained about it the entire time…now, if you think I’m heartless since I’m complaining about doing something nice for my mom, you’ve never seen her tree—it’s old school and a pain in the ass to put up, which is why she doesn’t put it up herself. Also, she didn’t help me at all with my two trees—both totaling 7 feet of tree—and she has three grandchildren that should have helped her anyway—but oh no, they have to think it’s magic how her house get decorated...

But I digress…

All in all, these treats are a lot like my Great Pumpkin DogTreats (and I’m kinda kicking myself for not using that same pup-kin pun with that one) only these were made using my trusty mini-muffin pan; and since I bought it especially for my sweet-potato pie treats, I was happy to find another use for it. All in all, I think it’s going to come in handy as it’s also almost the perfect size for a bite-sized indulgence for my boys. Plus, you know I do like to have variety with my dog treat recipes and mini-muffins are a new one for me.

In case you’re new to baking, a scant cup translates to just under 1 full cup—which is what’s left of a can of pumpkin if you had another recipe which called for 1 cup of pumpkin; and again, these treats are a great way to use that little left over bit from another recipe. Pumpkin is perfectly safe and fairly healthy for dogs, and I’ve talked about that several times. In fact, I’ve talked about all of these ingredients before, what they do, how they’re good for your pets, and why they’re being used in my treats—especially the usual suspects: oats, whole-wheat flour, unsweetened applesauce, and olive oil.

Olive oil was used because I didn’t have enough coconut oil, but that would be my substitution to offer there. You know, when trying to find a fat for a recipe—because fats do effect the texture and moisture of a baked good—it’s essential to find one that not only serves its purpose but also brings something else to the table; and olive oil is not only heart-healthy but can also help with weight loss and make your pet’s coat shiny and healthy. Like coconut oil, it can also be added to your pet’s diet to help with dry skin.

Presley faithfully waiting for dog treats
 Oats are a great, heart-healthy grain that add a nice texture and do double duty as an ingredient in the treat and for the topping. Since they’re mostly neutral in flavor, they blend well in almost any baked good. Truth be told, I use them mostly for their wholesome looks; but they’re really useful for more than that.

 Also, I’d like to note that when I say unsweetened applesauce I don’t mean sugar-free. Unlike sugar-free options, unsweetened applesauce is a healthy, natural option which contains no added sugars, no added high-fructose corn syrup, and no artificial sweeteners—which are things you’ll want to stay away from when baking for your four-legged friends. Artificial sweeteners can actually adversely affect your dog’s blood sugar levels and can lead to a scary situation. 

If you’ve reviewed this recipe, you’ll see that I’ve used not only used whole-wheat flour, as per usual, but also white or all-purpose flour. While wheat flour is healthier, all-purpose flour yields a more appetizing treat. As I talked about with my gluten-free treat recipes, different flours behave differently; and all-purpose flour is the gold standard, so to speak, when making baked goods for human consumption. Whole-wheat flour is heavier than all-purpose flour and tends to yield gummy and denser baked goods when used alone; and to overcome that, I’ve added a bit of white flour.

You can use all whole-wheat or all white flour; but know that whole wheat flour is the healthier option. With that being said, the little bit of white flour doesn’t necessarily make these any less healthy—after all, all-purpose flour isn’t the devil…Sometimes, it’s important to balance your expectations with what’s best for your pets. Both of my dogs are larger dogs (80+ lbs each) and only get treats as an additional part to an overall, fairly healthy diet. At any rate, I wanted these to be as close as possible—just far healthier—to a muffin I would eat; and the oats are actually going to prevent a lot of the gumminess if you go the entirely whole-wheat route.

Now, onto the spice mix—cinnamon, ginger, and cloves—all of which are common in fall baking; and I’ve used and talked about them before. These are interchangeable and can be adjusted based on availability and or preference. If you don’t have some of them, just adjust the others. When thinking about fall spices, nutmeg is a favorite of mine; but I’d steer you clear of nutmeg as it’s not as pet friendly.

One of the new ingredients in this recipe comes in the topping. Now, as per usual, the topping is totally option; but I think it elevates this treat in a great way. You simply combine molasses with the oats until fully coated then sprinkle on the treats with a few pepitas—it doesn’t get much easier than that. Molasses is a derivative of the sugar refining process and is commonly used in things like gingerbread and animal feed (like horse feed). It’s mildly sweet with a somewhat complex flavor and perfectly safe for your dog to ingest—in moderation of course. It is sweet and should only be used sparingly. My boys quite enjoy the flavor.

If molasses isn’t something you’d be likely to purchase, substitute honey or sorghum one for one instead. If it’s something you’re considering purchasing, go for a blackstrap variety as it will contain more trace minerals and end up being slightly healthier overall; but don’t stress, either variety will work as well. I liked the look and the added sweetness to the topping; and it’s a way for me to start to transition into my Christmas dog treats.

The prep for this recipe is as simple as mix and bake. I filled the muffin tins to about ¾ full and added a few pepitas on top before sprinkling on a bit of the molasses and oats. You may want to press it down a bit into the batter to help it stick better; but the treats should rise slightly around the topping anyway. Mine baked for 12 minutes when they were firm but springy to the touch; and yes, a toothpick inserted should come out clean.
 
Let them cool in the pan slightly—like 5 minutes—before removing them; and again, an offset spatula will be your best friend in this process. You can serve them to your dogs warm, room temperature, or chilled; but I’d let them cool completely prior to considering a storage solution. As with most of my dog treat recipes, I’d suggest the refrigerator for your immediate needs and then the freezer for longer-term preservation. I put mine in zip-top baggies in a single layer (12 fit fairly well in a quart-sized bag); kept 12 in the fridge and the rest in the freezer.

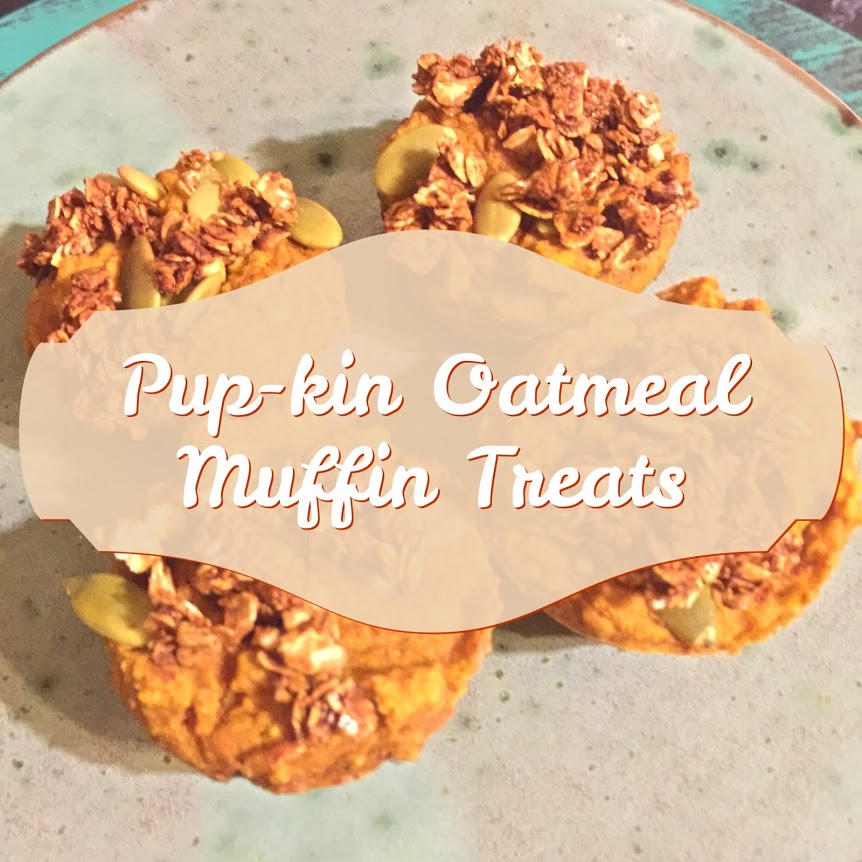
Overall, these treats look just like a fancy muffin you’d buy from a bakery; and again, this was one of the simplest recipes to make and smells amazing when baking. The pepitas give homage to the pumpkin contained within and the oat/molasses topping add a bit of crunch and further the visual interest. Thanks to the oats and all-purpose flour, the interior is soft and moist with a wonderful crumb. They seriously
look good enough to tempt almost anyone.

If you make this or any of my other treats, please feel free to share them with me via the social media links to the top right or via email; and also, don’t be shy if you have questions. As always, the actual recipe will follow below (or click here); and be sure to follow Jesse on Twitter @ Jdawg_yellow

Thanks for reading!!

Pup-kin Oatmeal Muffin Treats


Yields 40 mini-muffin treats

Ingredients:

1 scant cup canned pumpkin
1 whole large egg
¾ cup unsweetened applesauce
¼ cup olive oil
1 tsp vanilla
¼ tsp ground ginger
¼ tsp ground cloves
1 tsp cinnamon
¾ cup quick cooking rolled oats
½ cup whole wheat flour
¼ cup all purpose flour
1 tsp aluminum-free baking powder
½ tsp baking soda (most likely will be aluminum-free already)

Topping ingredients:

½ cup quick cooking rolled oats
2 tbs molasses
½ tsp cinnamon
Dash of ginger
Dash of cloves
Pepitas for sprinkling

Instructions:

Spray a mini-muffin pan with non-stick spray (coconut oil spray recommend). Preheat oven to 350 degrees Fahrenheit.

In a medium mixing bowl, whisk oats, flours, baking powder and soda and set aside. Then in a separate bowl, thoroughly mix pumpkin, egg, applesauce, oil, vanilla and other spices. Add wet ingredients to dry ingredients and fold until combined and nothing is dry. Set mixture aside.

If using toping, mix oats with spices then add molasses until oats are covered.

Scoop the pumpkin mixture into the prepared mini-muffin cups until approximately ¾ full. Then sprinkle with a few pepitas and crumble the oat/molasses topping. Bake in the 350 oven for approximately 12 minutes. Muffins should be springy and a tooth pick inserted should come out clean. Let treats cool slightly before using an offset spatula to remove from the pan.

Cool treats completely and give them to your dogs or place in an air-tight container or zip-top storage bag and freeze until ready to use.

For more tips/substitutions/instructions please see theAbout the Recipe section.

Saturday, November 12, 2016

About the recipe: Sweet Potato Pie Dog Treats


If someone would have told me three years ago that I’d one day formulate a dog-friendly sweet potato pie recipe, I would have thought them crazy—and that’s without any additional details. If they told me that I’d be comfortably living with a man for over a year (while dating for almost 3) and sharing two dogs together, I would have told them that they were crazy. Yet, here were are… it’s funny where life takes us and how (oh how) time flies.

But c’est la vie.

If truth be told, I’ve been thinking about (and excited for) this recipe for over two weeks…and was not disappointed with the final product which is a fairly impressive, complete, bite-sized, sweet potato pie. Also, I know if you’ve spied the recipe, you’re probably thinking I’m crazy (again); however, if you keep reading here, you’ll see that it’s a really manageable process that’s actually quite easy, fun, and ends up being somewhat extraordinary. Plus, it’s the perfect little Thanksgiving treat for our four-legged friends.

Thanksgiving isn’t my favorite holiday for various reasons; however, from a culinary stand point, it shouldn’t be overlooked. Fall flavors like cinnamon, allspice and cloves are highlighted in several savory dishes and desserts…and my dogs and I do love the flavors of fall. Plus, there are wonderful fall fruits and vegetables like pumpkin and sweet potatoes that are dog friends and healthy for our fur-babies.

Be sure to poke holes in the sweet potato prior to microwaving
In October, I seemed to highlight pumpkin (click here or here); so in November, I planned on using sweet potatoes in some way or another. Like pumpkin, sweet potatoes are packed with healthy nutrients and fiber. Plus, as they’re name suggests, they are naturally sweet—which is the best kind of sweet when it comes to dog treat ingredients.

I suppose I could have just re-posted Jesse’s Salmon andSweet Potato muffins as those were a wonderful use of the vegetable in question; but you know that’s not my style. Also, I didn’t want to post another rollout or drop treat as that’s what I’ve posted the last few times. Plus, Thanksgiving is the forgotten holiday (and if you doubt me, try to find Thanksgiving-specific decorations after Halloween)—these treats definitely needed to be special to mark the occasion.

Now, if you’ve looked over the recipe and think it’s a bear—don’t despair. It’s easier than it sounds and everything is fairly forgiving—starting with the crust which is a take on a shortbread piecrust that simply presses in place. There’s no rolling, crimping or worrying about cracks or being nervous that it won’t look perfect.

What is pie without a crust anyway? Well, that could be a rather lengthy debate…myself, I do enjoy a nice flaky crust; but in general, I’m satisfied with the cooler-section options as opposed to making one from scratch. No, I usually don’t make my own pie crusts…I find them somewhat intimidating, finicky, and I don’t notice that much of a difference in the taste when compared with the effort it takes to pick one up at the grocery store.

Pie crust ingrients
Even after having said all that, it shouldn’t come as a shock to anyone to know that I made this one from scratch because it was for my dogs—the shocking thing should be that I included one in this recipe. I mean, when you think about it, the crust is mostly just empty calories and packed with fat and added calories. A normal pie crust isn’t much more than fat and flour—neither of which have all that much nutritional value.

Since I’ve been thinking about this treat for weeks, I had time to mull it over. For these to be real pies, they need a crust…and for ease of making and adapting, I settled on a shortbread style crust that I found at MarthaStewart.com. Then in the past few days, I’ve been trying to decide on how to convert that into something that’s not just empty calories. The solution was to substitute an all-natural peanut butter for some of the fat.

You want the mixture to be slightly crumby
It worked out really well because if you think about this recipe independently with its various components then you’ll see that the pie crust I’ve come up could almost be used as a treat by itself as could the filling. The peanut butter adds not only fat but flavor and good protein; and the spices make everything more aromatic. All in all, it made me feel better about adding extra calories to what could have been a really low-calorie treat; and yes, you could use all peanut butter or all coconut oil…if you were to ask me though, I’d steer you toward the all peanut butter route as most dogs love peanut butter.

If you’ve never made a pie crust before, the cutting the fat (peanut butter and coconut oil) in with the flour and spices could sound confusing; however, it’s just as easy as taking a fork or pastry cutter and breaking down the fats to smaller pieces until it resembles a course meal—think somewhat lumpy corn meal. Then you add the water by the tablespoon until it starts to stick together…and don’t be scared to use your hands to squeeze it to see if it sticks and resembles pie crust. Yes, the fat cutting process works a bit easier if everything is cold so it doesn’t just congeal like cookie dough.

pressed into the pan
It will seem a bit dry; but again, the important thing is that it presses together to form a dough which you’ll be doing when you put it into the muffin pan. If you want bigger treats, you can use a standard-sized cupcake pan; but the mini ones will be cuter. After the dough is pressed into bottom and sides of the pan, then put it in the fridge to keep cool.

Once your crusts are prepared, move onto the sweet potato filling…and yes, you could easily cook your sweet potato first before making the crusts to ensure that it has plenty of time to cool. However, if you’ve noticed there’s only 1 egg white in the filling making it not that much of a concern especially if you follow the order of ingredients. If there were more eggs, I’d have a much stronger caution against mixing the eggs in before the sweet potato is cool as you could end up cooking the eggs; but the bananas will help cool the sweet potato anyway.

Now, usually, I’d tell you that it doesn’t matter if you use a fresh sweet potato or canned; however, as sweet potatoes are usually canned with added sugar and or a syrup, I’d almost insist on you using a fresh one. If it makes you nervous to cook a sweet potato or if you don’t want to mess with mashing it up, go ahead and substitute canned, pureed pumpkin—a whole can will probably swap out quite fine.

mashed up bananas
The egg white was only added to the filling as I kind of needed 1 ½ eggs to make the crust—and you can’t really half an egg…and I didn’t want to waste the egg white. The spices are classic for a sweet potato pie—save the allspice. Usually, there’s nutmeg involved; and in general, I’ve read that nutmeg isn’t good for dogs. Cinnamon has anti-inflammatory properties, and cloves can help with internal parasites—and from what I can tell, allspice is fairly neutral…but increases that fall smell quite a bit. If you don’t have cloves or allspice, I’d just swap out for more cinnamon.

Ordinarily I don’t add sugars or sweeteners; but I felt for a special holiday treat, a little honey would be okay. As it’s only 1 tablespoon, you could omit it because it won’t make a difference to the end product; but I liked adding it—and that’s the important part, right.

Sweet Potatoes mashed with the Bananas
With the crust having a high fat content, I felt it important to make the filling lower in fat; and besides, I had two very ripe bananas. Bananas can be substituted for eggs which are usually an ingredient in sweet potato or pumpkin pies; however, I know eggs firm up when cooked but wasn’t quite sure how only using bananas would work in this case which is why there’s tapioca flour/starch included. Like other starches (corn starch, arrow root—which could be substituted), tapioca starch will thicken the mixture when it’s baked to resemble an ordinary pie filling (FYI—just as a note, a friend of mine just shared a paleo pumpkin pie recipe she has with me, which is eerily, unintentionally similar to this one that does not use a starch to thicken at all, so I think you’ll do fine without it).

Most dogs tend to be lactose intolerant, so a substitute for milk was needed; and our final component is coconut milk which is standing in for dairy. We’re also going to use coconut milk in the cream topping; and I’d picked up an unsweetened, low-fat, organic can at my local discount grocery store on the cheap and it’s been sitting in the cabinet for a while. It actually ends up making the treats smell almost tropical what with the bananas and all.

Overall, the filling isn’t a runny as a pumpkin pie filling would be (and I’ve never made a sweet potato pie myself, so I can’t make a comparison there), but it works quite well in this recipe. When it’s all mixed, you’ll spoon it into the chilled pie crusts. I filled mine completely; and it took a full tablespoon per cup. Mine baked for 10 minutes at 425 degrees.

When I took them out of the oven, I let them cool for like 15 minutes in the pan; and then I used an offset spatula to help free them from the cups. Mine didn’t stick at all as there’s plenty of fat in the crust; and I wouldn’t spray the pans even if you’re worried—once they’re cool, they’ll slide out easily—I only used the spatula as mine were flush to the top and I didn’t want to invert the pan to get them out.

The topping ends up looking like whipped cream; and I suppose you could use coconut cream to make your own version. Cream cheese is somewhat dog safe; and I turned to a fat-free cream cheese to keep things lower in fat overall. The tapioca starch is used since powdered sugar would be too much added sugar; and the starch helps stabilize the cream cheese so it can be thinned back out by the coconut milk. The tapioca starch sounds like a waste when I put it like that, but it’s not—and if you try to mix the mix with the cream cheese without it, good luck not ending up with a lumpy icing that doesn’t look appetizing.

Now, I will say it’s completely optional to make the topping; and if you don’t have tapioca starch, you can use corn starch…but tapioca starch is a bit finer and will mix a little better… plus, it is a little sweet. Just don’t use powdered sugar (too sweet) or flour (too pasty)…

I actually made these in stages—the crust I made the night before; so my boys didn’t really get all that excited by the process until they were in the oven and the house smelled like fall. Also, I think because I was using a muffin pan, they weren’t quite sure if these treats were for them or not; but once they were presented with the finished product, they seemed happy with the results.

For me, the fact that this is really a pie treat impressed me. I mean, the filling remained soft like a traditional pie with the crust getting a little firm. Then the final flourish of the topping made it even more over the top; and I had actually went through the trouble to pipe it on but decided that I liked the look better to just spread a little on each one—and for storage, that’s the way I’d suggest going as a huge dollop won’t set and will be a big ole mess. 
More than a little curious
 
As I plan to share most of these treats (and have already—the lady
who rents our house next door has the sweetest little dog who’s been the recipient of several treats), I’ve moved all of mine to the fridge in a container; but the icing did set meaning these would be fine for a plastic baggie and the freezer for long-term storage.

If you haven’t already, check out the recipe below (or clickhere) and make these for a Thanksgiving or anytime treat for your own furbaby! As always, please email me with any questions or comments or leave them in the contacts—or by using the social media links at the top right of the page; and please be sure to follow Jesse on twitter @jdawg_yellow

Thanks for reading!!

Sweet Potato Pie Dog Treats


Yields: 36 Mini-Pies

Ingredients:

Pie Crust:

¼ cup peanut butter
2 Tbs coconut oil
1 large whole egg + 1 egg yolk
½ tsp ground cloves
1 tsp cinnamon
¾ cup all-purpose white flour
¾ cup whole-wheat flour
3-5 tbs cold water

Sweet Potato Filling:

1 lb sweet potato (cooked and cooled)
2 ripe medium-sized bananas
1 Tbs honey
1 egg white
1 tsp cinnamon
¼ tsp ground cloves
¼ tsp ground allspice
¾ cup coconut milk
3 Tbs tapioca starch

Cream topping:

4 oz fat free cream cheese
1/3 cup tapioca starch
2 Tbs coconut milk

Instructions:

Pie crust:

In a small mixing bowl, lightly whisk flours and spices. Mix in egg & yolk. Then add peanut butter and coconut oil and cut in using a fork or pastry cutter until mixture resembles a course meal—the flour should have pea-sized lumps of peanut butter and coconut oil in it. Then add cold water by the tablespoon until the mixture starts to come together as a dough when pressed (when you squeeze it with your hands, it should stick together and no longer be crumbly).

Place approximately 3 tsp of the crumbly dough into a non-stick mini-muffin and press down along the bottom and sides of the cups. There should be enough dough for 36 mini-muffin cups. Once your dough is into the pan, place the pan in the refrigerator while you mix your filling.

Preheat oven to 425 degrees Fahrenheit

Filling:

Wash and dry your sweet potato, then prick with a fork all over and place in a microwave and cook in 2 minute intervals until fork tender (a fork will poke through easily once cooked). You can also cube and boil or roast in the oven. Set aside until cool enough to handle easily.

Mash 2 bananas until slimy (or no big lumps of banana can be seen). Add cooled sweet potato and honey and continue mashing until the mixture looks fairly uniform. Add egg white and spices and coconut mix and continue to mix until well combined. Then add tapioca starch and mix until no more white can be seen.

Remove chilled mini-muffin with crust pressed into cups and add filling by the tablespoon to fill each cavity completely. And bake for 10 minutes until the filling is completely set.

Allow to cool in pan for at least 10 minutes or completely. Then remove and allow to cool further on a wire rack.

Cream topping:

Using room temperature cream cheese, mix in tapioca starch until uniform. Then add coconut milk and mix until incorporated and very spreadable.

Once treats are cool, top with cream topping.

For further instructions, tips, and tricks, please read the About the Recipe section!